This article is a continuation of our earlier post on Automate Document Conversion using Zapier. In this article, we are specifically going to discuss the steps and related details on how to merge documents using Zapier. We will load the source files from Google Drive and will save the output in Dropbox. In order to fulfill this requirement, the Merge App on Zapier is our solution.
Dropbox Account
In our current scenario, we plan to save the resultant merge file in Dropbox therefore, we need to first set up an account on Dropbox. Complete the sign-up process and create a folder named Documents under All files.
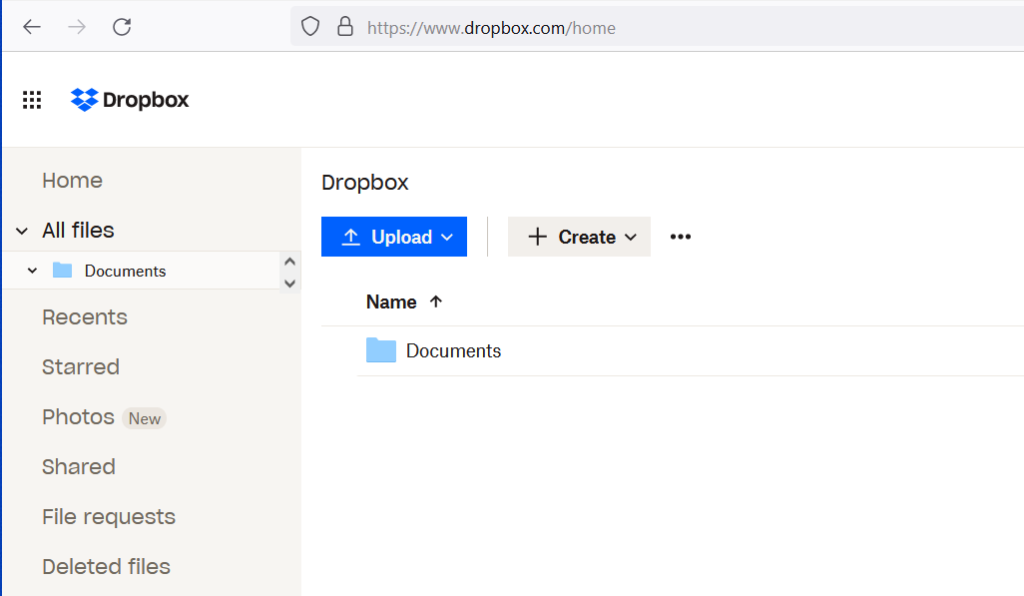
Image 1:- Preview of Dropbox main dashboard.
Aspose.Cloud Dashboard
Aspose.Cloud dashboard provides a centralized interface to manage artifacts on Cloud storage so we need to set up an account to work with Cloud APIs. Please take a look over this blog post to learn more about setting up an account on Aspose.Cloud dashboard.
- Instead of selecting the Internal Storage option, please select Dropbox Storage option
- Provide a name for Storage i.e. Dropbox Storage and click Generate Token button
- Provide sign-in details for Dropbox account and link it with Aspose.Cloud
- A system generated Access token becomes visible in field
- Click the Save button
- Now open Dropbox account, click the icon on Top-Right of screen and select Settings option from menu
- Click the Connected apps tab and notice that Aspose.Cloud is listed as connected App
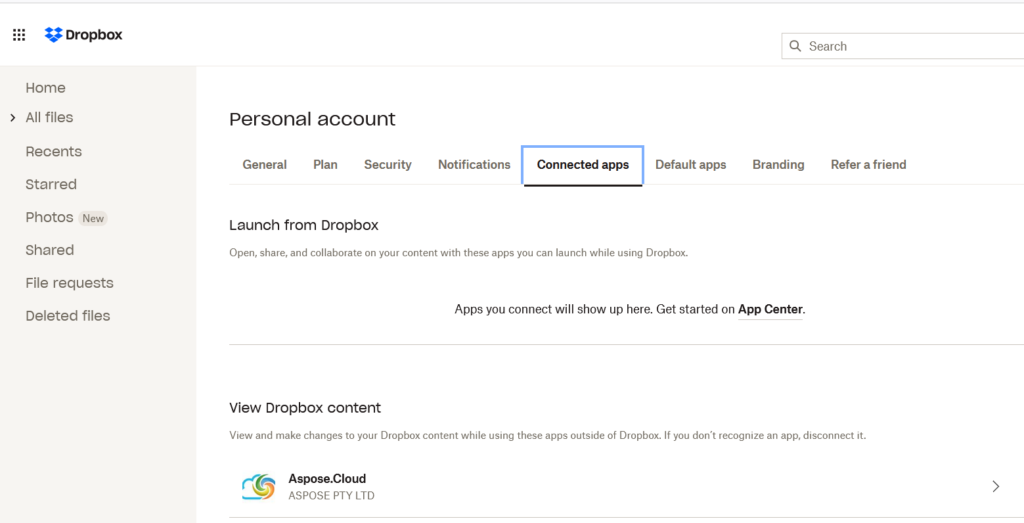
Image 2:- Preview of Dropbox Connected apps
- Click Applications option on Aspose.Cloud Dashboard and notice Dropbox is appears as default storage
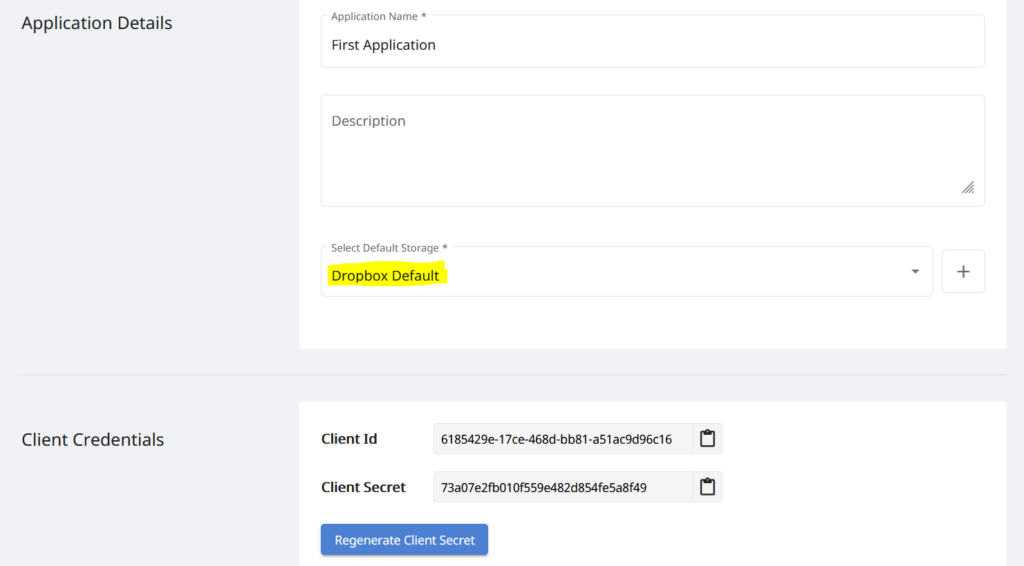
Image 3:- Dropbox listed as default storage of application.
Google Drive Account
The next main step is to set up a Google Drive account because the files available/uploaded to Google Drive will be merged using Zapier. If you already have an account, please log in or create a new one. Right-click the My Drive option from the left menu and select the New Folder option. Enter name as Documents and click CREATE button. A new folder named Documents is created under My Drive.
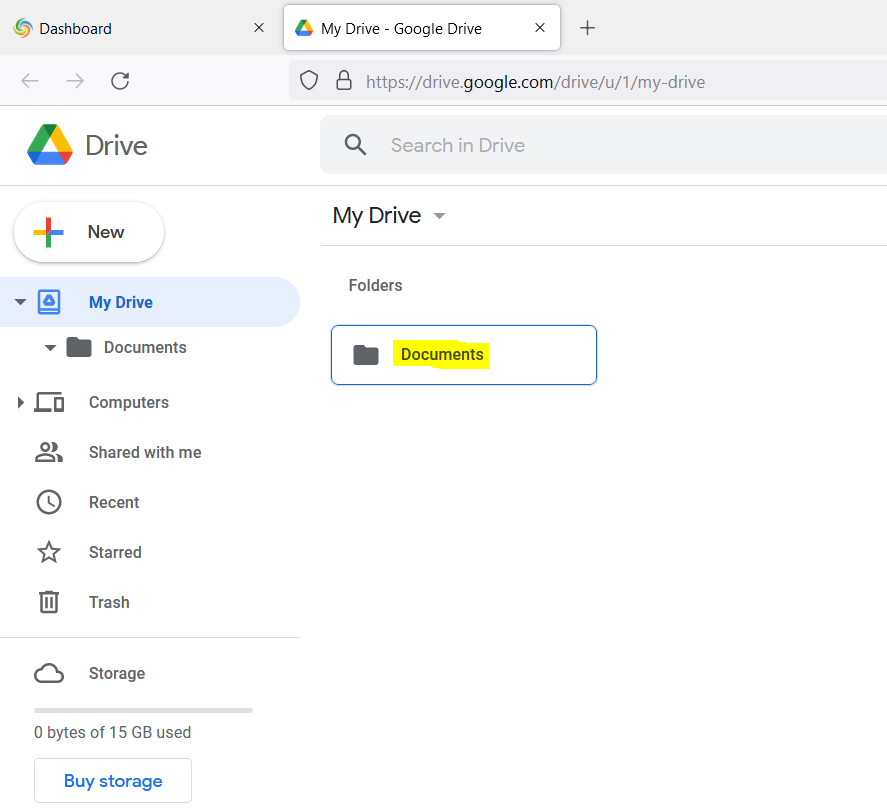
Image 4:- Google Drive account preview.
Zap for Documents Merger
Please follow the instructions specified below to create Zap for document merger.
- Visit zapier.com and sign up new account
- The dashboard screen will be displayed as given below
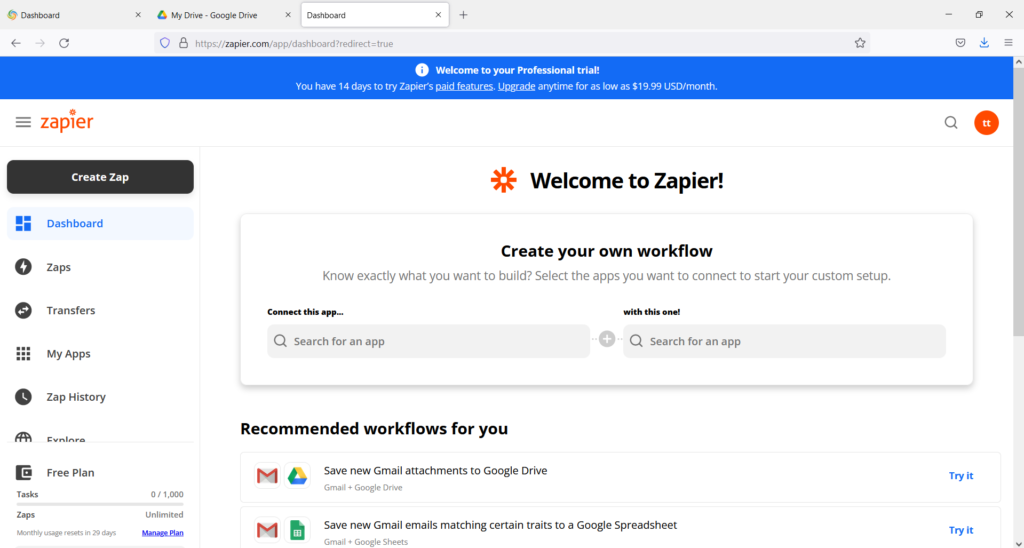
Image 5:- Zapier dashboard preview.
- Enter Google Drive in Connect this app… and Aspose in with this one ! text fields
- Select New File in Folder option from When this happens… and Convert option from then do this! dropdown
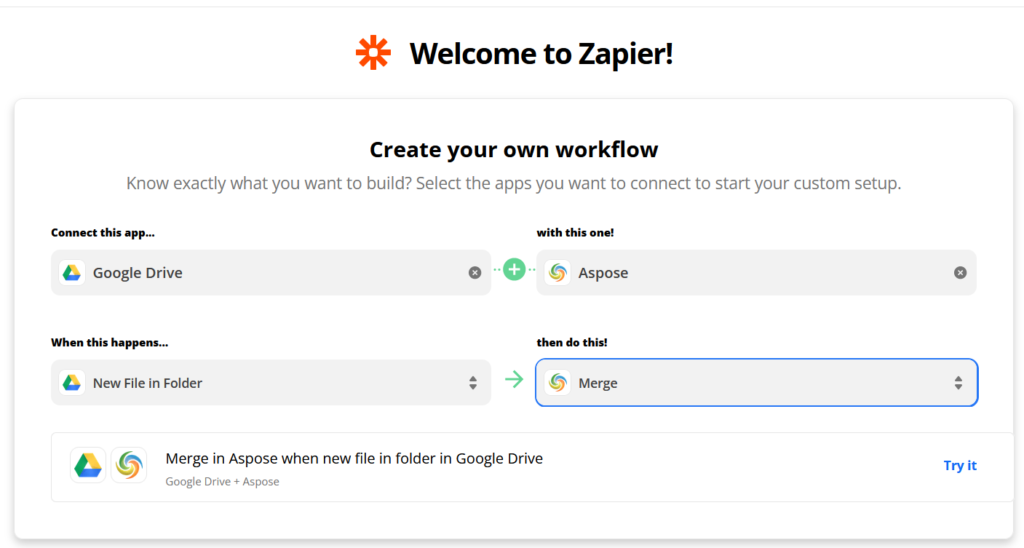
Image 6:- Merger ZAP details.
- No click the Try it button.
- On subsequent screen, click the Get Started button
- Click the Connect button and enter your Google account details. After Sign in, click Allow on permissions screen
- Now click Next button and select Google drive you need to connect. In our case, select My Google Drive radio button and click Next button
- Select Documents folder (that we created earlier) and click Next button
- The next step is to connect Aspose account. Click the Connect button on screen displayed below
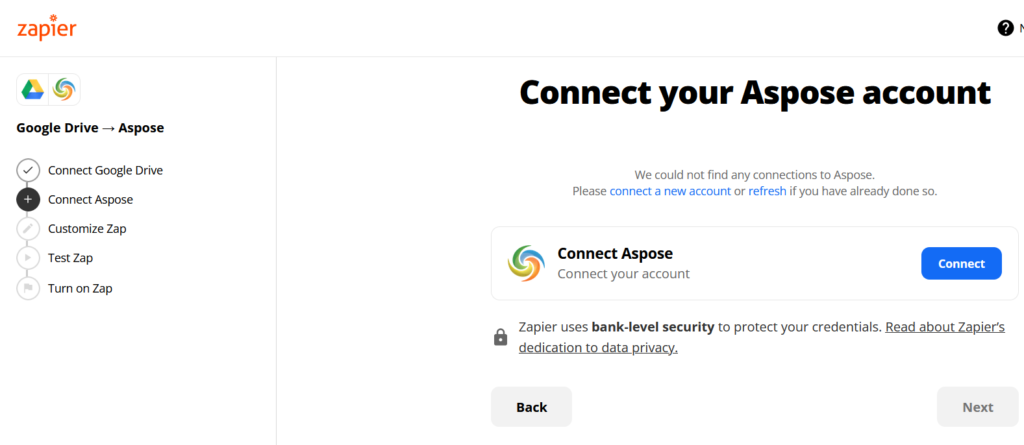
Image 7:- Preview to connect Aspose account
- A screen will be displayed asking for Client ID and Client credential details which are available on Aspose.Cloud Dashboard
- Now open the dashboard and select Applications option from left menu
- Click First Application we created in earlier steps. Copy Client ID and Client Credentials details from screen and enter on Aspose account connect screen. Then click Yes, Continue button
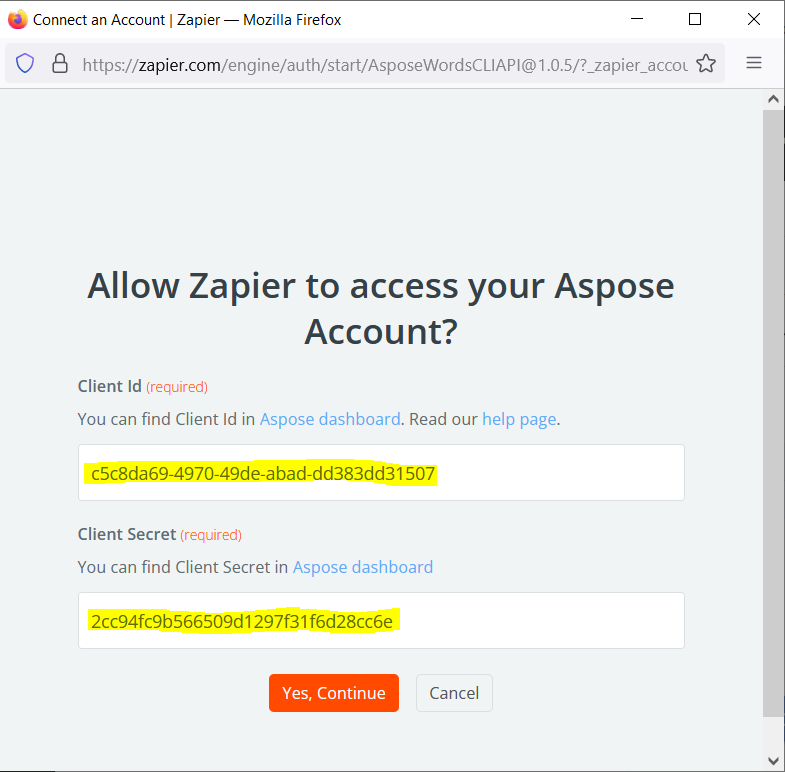
Image 8:- Aspose account credentials for connectivity.
Once correct details are provided, the following screen with a success message will be displayed

Image 9:- Successfully connected Aspose account.
On the subsequent screen, select File under Documents dropdown and PDF under Output Format. You may select output format as per your requirements i.e. DOT, DOCM, markdown, HTML, SVG, XPS, etc. Then click the Next button
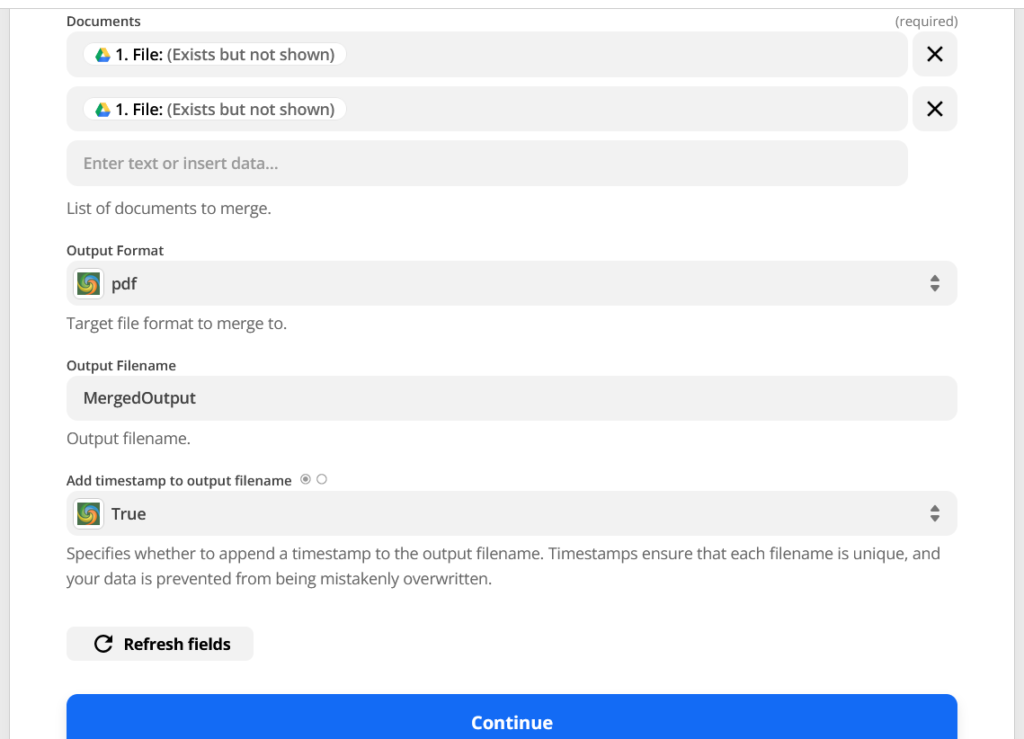
Image 10:- Document merge trigger
- On the Zap test screen, click the Send test button. If all the details are correct, a success message will be displayed
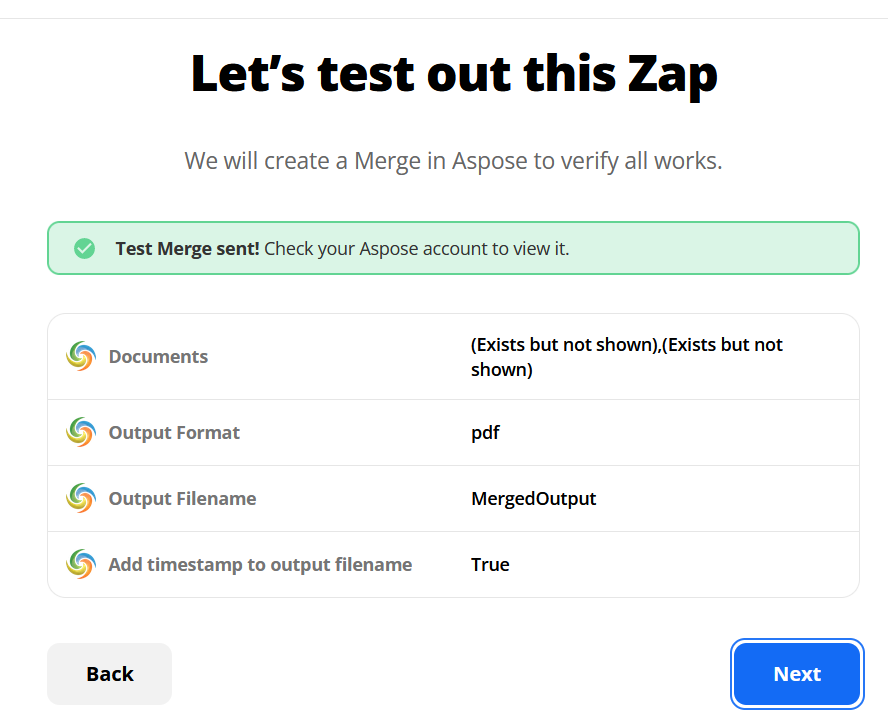
Image 11:- Zap success connectivity message
- Open Dropbox account and notice the new merged file is generated
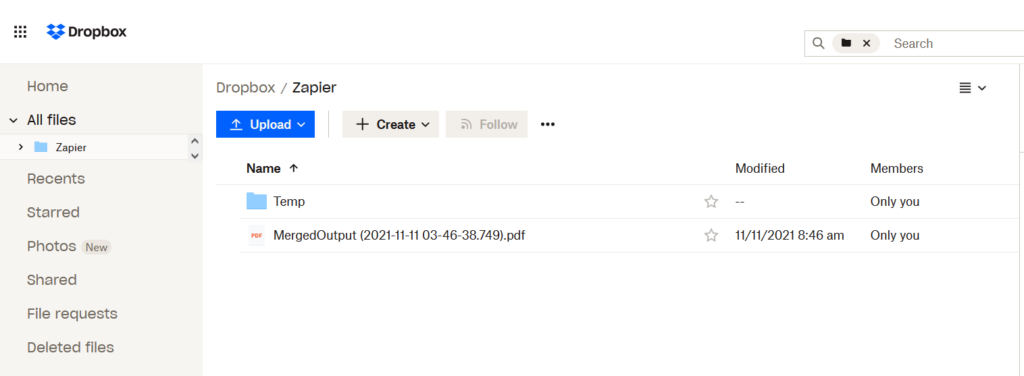
Image 12:- Dropbox output preview
Conclusion
In this article, we have discussed the steps to merge documents using Zapier. The process is so convenient that without writing a single code line, you can automate your document processing. Apart from Merge operation, you may consider performing Split, Merge, Classify, etc. Please note that our Cloud APIs are built under MIT license, so their complete code is available for download over GitHub.
In case you encounter any issues while using our APIs or you have any further queries, please feel free to contact us via free customer support forums.
Recommended Articles
If you need to programmatically implement document conversion/processing capabilities, please take a look over the following articles: