Convert DCM to JPG in Java
The Digital Imaging and Communications in Medicine (DICOM) is the standard for the communication and management of medical imaging information and related data. It also contains multiple monochrome images along with a rich set of metadata. Such information can be anything from patient information, institution, modality, and more. Furthermore, its popular because they can easily provide integration of medical imaging devices such as scanners, servers, workstations, printers, network hardware. However, in order to display the DICOM image, we need specific application and it gets really difficult when we need to display it inside a web page. So one of the viable solution is to convert DICOM to JPG format. Another benefit of JPEG files is that it contains a single monochrome (or color) image. Since the JPG image do not have an associated meta-data, so it reduces the size of image and the output is also compressed/smaller in size.
DICOM Images Conversion API
Aspose.Imaging Cloud SDK for Java enables you to implement popular image formats processing capabilities. You can edit and transform raster images, Photoshop files, Metafiles and other formats such as WebP. Similarly, it is equally capable of processing DICOM images and we are going to use it for the conversion of DCM to JPG format. Now in order to get started with SDK utilization, we need to add its reference in our java project by including following information in pom.xml (maven build type project).
<repositories>
    <repository>
        <id>aspose-cloud</id>
        <name>artifact.aspose-cloud-releases</name>
        <url>https://artifact.aspose.cloud/repo</url>
    </repository>
</repositories>

<dependencies>
    <dependency>
        <groupId>com.aspose</groupId>
        <artifactId>aspose-imaging-cloud</artifactId>
        <version>22.4</version>
    </dependency>
</dependencies>
If we have already registered on Aspose Cloud Dashboard, please obtain your client credentials from Cloud Dashboard. Else, you need to first register a free account while using a valid email address.
Convert DCM to JPG in Java
This section provides the details on how to load and convert DCM to JPG format using Java code snippet.
- Create an object of ImagingApi using personalized client credentials
- Now load the DCM file using readAllBytes(…) method and pass to byte[] array
- Create an instance of UploadFileRequest while providing DICOM image name argument and uploading it to cloud storage using uploadFile(…) method
- Next step is to create an object of ConvertImageRequest which takes input DCM name and JPG as arguments
- Call the method convertImage(…) to convert DCM to JPG format and result is returned as response stream
- Finally, save the resultant JPG to local drive using FileOutputStream object
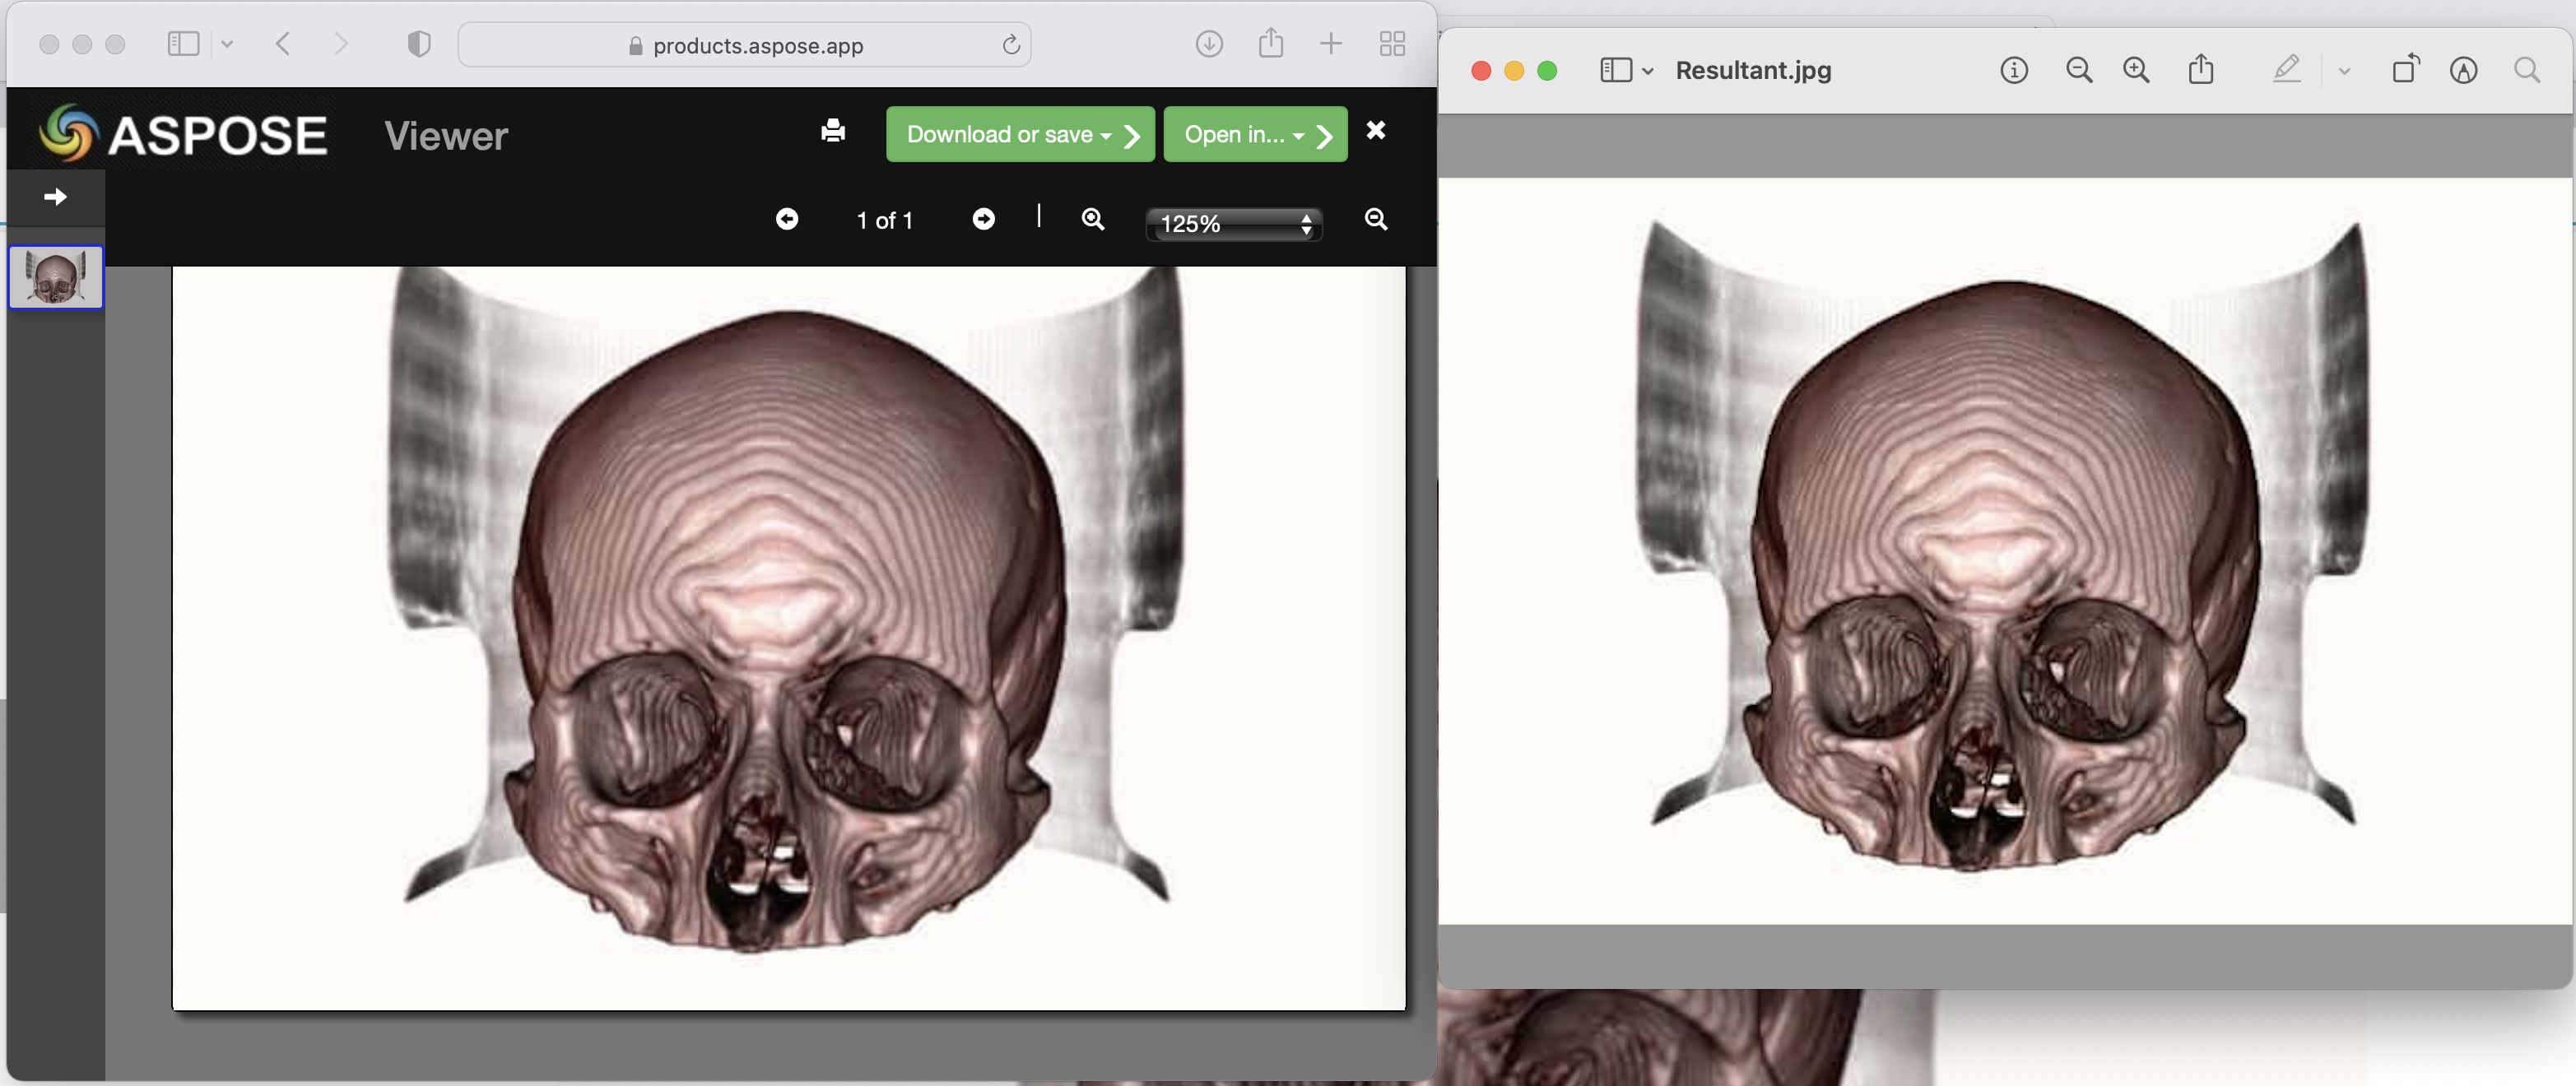
The sample DICOM image used in above example can be downloaded from skull_2.dcm and the output from Resultant.jpg.

Image:- DCM to JPG conversion preview
DCM to JPG using cURL Commands
Other than programming language, the REST APIs can also be accessed via cURL commands. Since Aspose.Imaging Cloud is developed as per REST architecture, so in this article, we are going to discuss the details on how to convert DICOM Images to JPG using cURL commands. The first steps is to generate a JWT access token (based on client credentials) using following command.
curl -v "https://api.aspose.cloud/connect/token" \
-X POST \
-d "grant_type=client_credentials&client_id=bb959721-5780-4be6-be35-ff5c3a6aa4a2&client_secret=4d84d5f6584160cbd91dba1fe145db14" \
-H "Content-Type: application/x-www-form-urlencoded" \
-H "Accept: application/json"
After the JWT generation, please execute the following command to convert DCM to JPG format.
curl -v -X GET "https://api.aspose.cloud/v3.0/imaging/input.dcm/convert?format=Resultant.jpg" \
-H  "accept: application/json" \
-H  "authorization: Bearer <JWT Token>" \
-o Resultant.jpg
Conclusion
We have discussed the details on how we can programmatically convert DICOM Images to JPG format using Aspose.Imaging Cloud SDK for Java. At the same time, we have also explored an option to convert DCM to JPG using cURL commands. Furthermore, the Product Documentation is an amazing source of information to learn about other exciting features offered by the API.
Please note that the API features can also be tested using SwaggerUI within a web browser and the complete source code of Cloud SDK is available on GitHub (under MIT license), so you may consider downloading and modifying it as per your convenience. Lastly, in case you encoutner any issues while using the API, you may consider approaching us for a quick resolution via free product support forum.
Related Articles
Please visit the following links to learn more about: