
在 PDF 頁腳部分中添加圖像和文字在各種情況下都很有用,例如在文件中添加品牌或法律資訊。在許多行業中,在文件每頁底部添加公司徽標或免責聲明是一項常見要求。在其他情況下,可能需要新增頁碼或其他元資料來幫助組織或識別文件。無論具體用例如何,在 PDF 文件頁腳部分添加圖像和文字的能力對於許多企業和組織來說都是一項重要功能。在本文中,我們將探討如何使用 Python Cloud SDK 將圖像和文字新增至 PDF 文件的頁尾部分。
頁腳的另一個術語稱為「跑腳」。它在出版業中得到廣泛應用,之所以這樣稱呼,是因為它包含文章的縮短版本或有關文章的其他資訊。
- Python 雲端 SDK
- 使用 Python 在 PDF 中新增文字頁腳
- 使用 Python 在 PDF 中新增圖像頁腳
- 使用 cURL 指令為 PDF 新增文字頁腳
- 使用 cURL 指令將圖像頁尾新增至 PDF
Python 雲端 SDK
Aspose.PDF Cloud SDK for Python 提供了一組用於處理 PDF 文件的強大功能,包括能夠為 PDF 文件頁腳部分添加圖像和文字。該 SDK 提供了一個簡單直覺的介面,可以輕鬆地以程式設計方式執行各種與 PDF 相關的任務。使用此 SDK,您可以快速輕鬆地將自訂文字或圖像新增至任何 PDF 文件的頁腳,為您的文件提供專業和客製化的外觀。
該 SDK 可透過 PIP 和 GitHub 儲存庫下載。但是,您可以簡單地在終端機/命令提示字元上執行以下命令來在系統上安裝最新版本的 SDK。
pip install asposepdfcloud
下一個重要步驟是從 雲端儀表板 取得客戶端憑證。如果您有 GitHub 或 Google 帳戶,只需註冊或點擊 建立新帳戶 按鈕並提供所需的資訊。
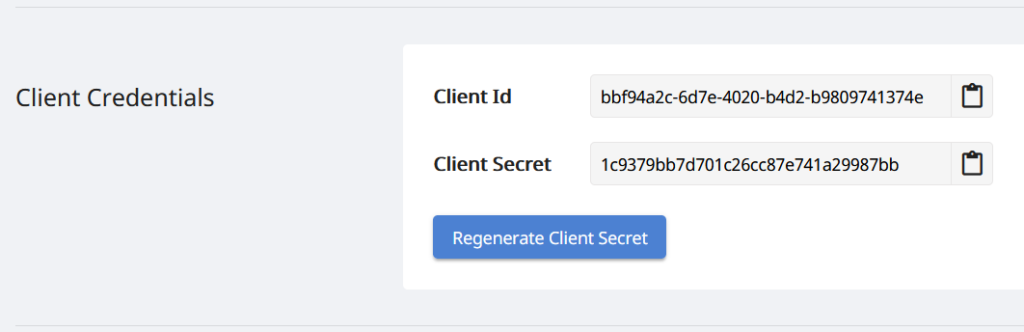
圖 1:- Aspose.Cloud 儀表板上的客戶端憑證。
使用 Python 在 PDF 中新增文字頁腳
請依照以下步驟使用 Python 程式碼片段在 PDF 文件中新增文字頁尾。
- 第一步是建立 ApiClient 類別的實例,它需要客戶端 ID 客戶端金鑰作為參數。
- 其次,建立一個 PdfApi 類別的實例,該實例需要 ApiClient 物件作為輸入參數。
- 第三,建立一個 TextFooter 對象,我們將水平對齊方式設為 Center、不透明度設為 0.7、旋轉角度設為 356 度,並將底部邊距指定為 5。
- 為了設定 TextFooter 的文字格式,建立一個 TextState 對象,我們在其中定義前景色、字體大小、字體名稱等。
- 現在我們需要設定兩個可選參數的值來定義 PDF 文件的起始頁和結束頁以放置文字頁腳。
- 最後,呼叫 postdocumenttextfooter(..) 方法將文字頁腳新增至 PDF 文件並將結果檔案儲存至雲端儲存。
def addTextFooter():
    try:
        #Client credentials
        client_secret = "1c9379bb7d701c26cc87e741a29987bb"
        client_id = "bbf94a2c-6d7e-4020-b4d2-b9809741374e"

        #initialize PdfApi client instance using client credetials
        pdf_api_client = asposepdfcloud.api_client.ApiClient(client_secret, client_id)

        # 建立 PdfApi 實例並傳遞 PdfApiClient 作為參數
        pdf_api = PdfApi(pdf_api_client)

        # 輸入 PDF 文件
        input_file = 'marketing.pdf'

        # 建立 TextFooter 實例
        textFooter = asposepdfcloud.TextFooter()
        textFooter.background = True
        # 將頁尾的水平對齊方式設定為居中
        textFooter.horizontal_alignment = 'Center'
        # 將頁腳的不透明度設為 0.7
        textFooter.opacity = 0.7
        textFooter.rotate = None
        # 設定旋轉角度為 5 度
        textFooter.rotate_angle = 5
        textFooter.x_indent = 100
        textFooter.y_indent = 100
        textFooter.zoom = .8
        # 在頁尾部分顯示的文字值
        textFooter.value = 'Aspose.PDF Cloud SDK for Python'

        # 建立 TextState 實例來定義文字的格式
        textState = asposepdfcloud.TextState(font_size=15, font='Arial', foreground_color=
              {"A": 0,
              "R": 66,
              "G": 111,
              "B": 245},
              background_color= {
              "A": 10,
              "R": 179,
              "G": 245,
              "B": 66},
              font_style=1)
        # 將 TextState 物件分配給 TextFooter
        textFooter.text_state = textState

        # PDF 的頁尾起始頁
        startPage = 2
        # PDF 的結束頁作為頁腳
        endPage = 3

        # 呼叫 API 在 PDF 檔案的第二頁和第三頁新增文字頁腳
        response = pdf_api.post_document_text_footer(name = input_file, text_footer= textFooter, start_page_number = startPage, end_page_number=endPage)

        # 在控制台中列印回應代碼
        print(response)

        # 在控制台中列印訊息(可選)
        print('Text Footer successfully added to PDF !')
    except ApiException as e:
        print("Exception while calling PdfApi: {0}".format(e))
        print("Code:" + str(e.code))
        print("Message:" + e.message)
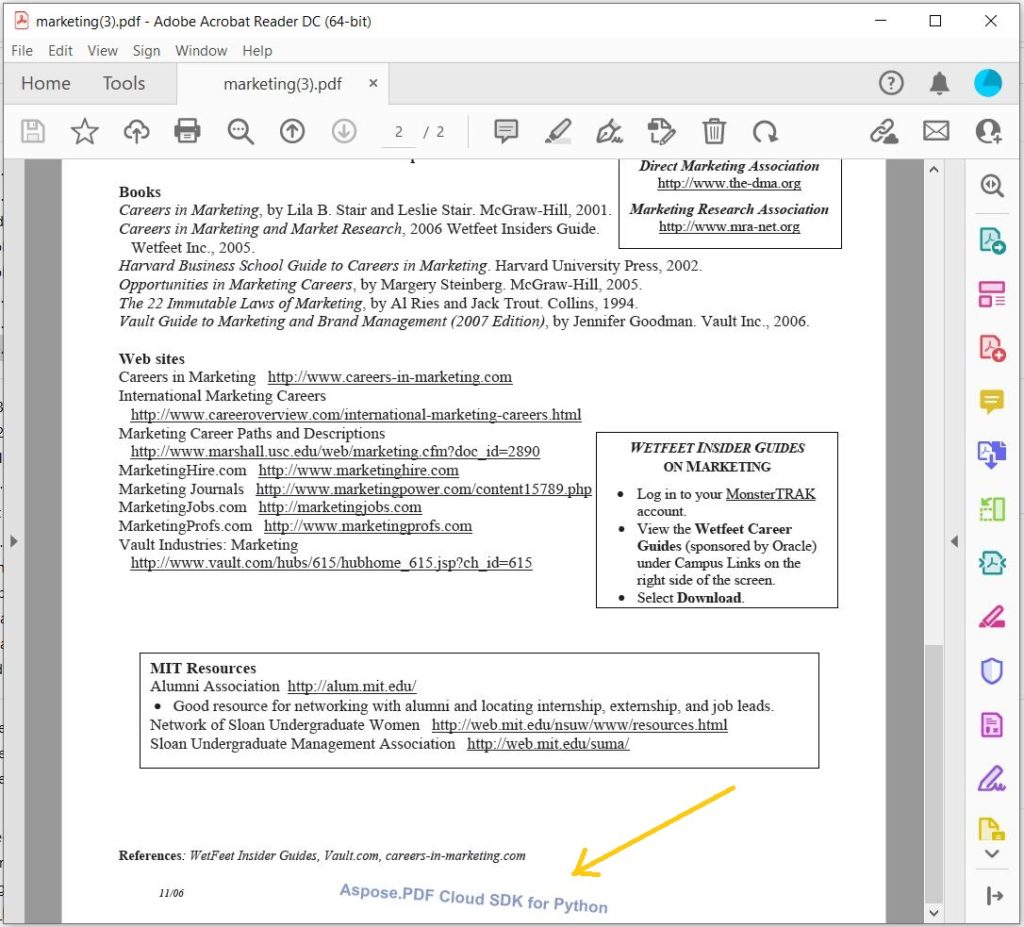
圖 2:- 新增到 PDF 的 TextFooter 預覽。
請造訪以下連結下載輸入的marketing.pdf和結果的marketing-TextFooter.pdf。
使用 Python 在 PDF 中新增圖像頁腳
API 還提供為 PDF 檔案添加圖像頁腳的功能。請按照下面給出的說明來完成此要求。
- 第一步是建立 ApiClient 類別的實例,它需要客戶端 ID 客戶端金鑰作為參數。
- 其次,建立一個 PdfApi 類別的實例,該實例需要 ApiClient 物件作為輸入參數。
- 第三,建立一個 ImageFooter 對象,我們將水平對齊方式設為 Center、不透明度設為 0.7、旋轉角度設為 10,並指定了影像檔案名稱、邊距詳細資料和其他屬性。
- 因為我們只需要將頁尾加入到文件的第一頁,所以我們為startpagenumber和endpagenumber可選參數設定了值。
- 最後,呼叫 postdocumentimagefooter(..) 方法將文字頁腳新增至 PDF 文件並將結果檔案儲存至雲端儲存。
def addImageFooter():
    try:
        #Client credentials
        client_secret = "1c9379bb7d701c26cc87e741a29987bb"
        client_id = "bbf94a2c-6d7e-4020-b4d2-b9809741374e"

        #initialize PdfApi client instance using client credetials
        pdf_api_client = asposepdfcloud.api_client.ApiClient(client_secret, client_id)

        # 建立 PdfApi 實例並傳遞 PdfApiClient 作為參數
        pdf_api = PdfApi(pdf_api_client)

        # 輸入PDF文檔
        input_file = 'marketing.pdf'

        # 建立 ImageFooter 實例
        imageFooter = asposepdfcloud.ImageFooter()

        # 在 PDF 內容頂部呈現頁眉
        imageFooter.background = False
        # 設定左對齊
        imageFooter.horizontal_alignment = 'Left'
        # 將不透明度設為 70%
        imageFooter.opacity = 0.7
        imageFooter.rotate = None
        imageFooter.rotate_angle = 10
        imageFooter.x_indent = 10
        imageFooter.y_indent = 10
        imageFooter.zoom = .7

        # 輸入影像檔案
        imageFooter.file_name = 'Koala.jpg'
        # 設定影像寬度和高度細節
        imageFooter.width = 100
        imageFooter.height = 100
        # 指定頁腳圖像的邊距詳細信息
        imageFooter.bottom_margin = 2
        imageFooter.left_margin = 1
        imageFooter.right_margin = 10

        # 文檔的起始頁新增頁腳
        startPage = 1
        # 文檔的起始頁新增頁腳
        endPage = 1

        # 呼叫 API 渲染 PDF 檔案中的圖片頁腳
        response = pdf_api.post_document_image_footer(name = input_file, image_footer= imageFooter, start_page_number = startPage, end_page_number=endPage)

        # 在控制台中列印回應代碼
        print(response)

        # 在控制台中列印訊息(可選)
        print('Image Footer successfully added to PDF !')
    except ApiException as e:
        print("Exception while calling PdfApi: {0}".format(e))
        print("Code:" + str(e.code))
        print("Message:" + e.message)
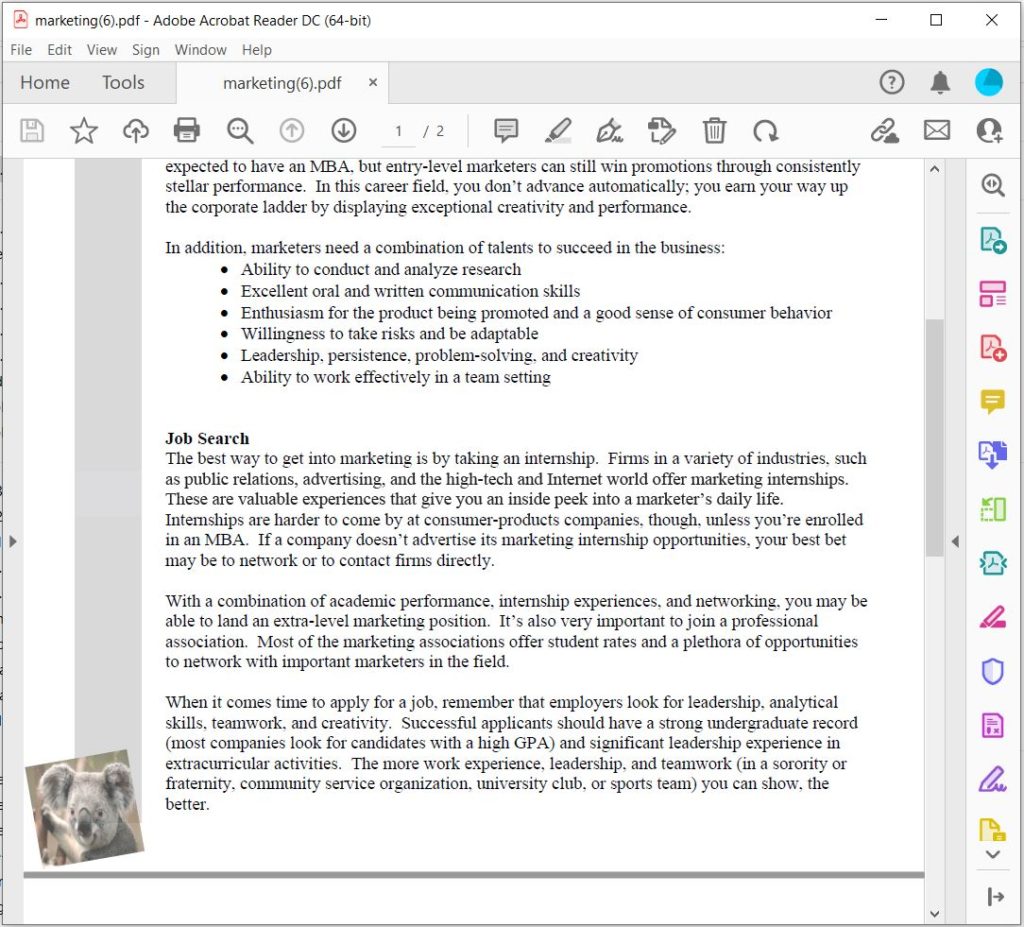
圖 3:PDF 中影像頁尾的預覽。
上述範例產生的結果檔案可以從marketing-ImageFooter.pdf下載。
使用 cURL 指令為 PDF 新增文字頁腳
使用 cURL 命令和 Aspose.PDF Cloud 在 PDF 頁腳中新增文字和圖像可以帶來多種好處。首先,它消除了手動編輯 PDF 文件的需要,這既費時又容易出錯。其次,它允許輕鬆自訂標題文本,並能夠更改文本的字體、大小、顏色和位置。第三,它允許用戶同時向多個PDF文件中添加文本,節省時間,提高效率。最後,這種方法提供了一種向 PDF 標題添加文字的安全可靠的方法,所有資料都透過安全連接傳輸並在安全伺服器上處理。
現在,作為先決條件,透過執行以下命令來產生 JSON Web Token (JWT)。
curl -v "https://api.aspose.cloud/connect/token" \
-X POST \
-d "grant_type=client_credentials&client_id=88d1cda8-b12c-4a80-b1ad-c85ac483c5c5&client_secret=406b404b2df649611e508bbcfcd2a77f" \
-H "Content-Type: application/x-www-form-urlencoded" \
-H "Accept: application/json"
現在我們已經產生了 JWT 令牌,我們需要執行以下命令將 TextFooter 新增到 PDF 檔案。
curl -X POST "https://api.aspose.cloud/v3.0/pdf/marketing.pdf/footer/text?startPageNumber=2&endPageNumber=3" \
-H  "accept: application/json" \
-H  "authorization: Bearer <JWT Token>" \
-H  "Content-Type: application/json" \
-d "{  \"Background\": true,  \"HorizontalAlignment\": \"Center\",  \"Opacity\": 0.7,  \"Rotate\": \"None\",  \"RotateAngle\": 5,  \"XIndent\": 100,  \"YIndent\": 100,  \"Zoom\": 0.8,  \"Value\": \"Aspose.PDF Cloud SDK for Python\",  \"TextState\": {    \"FontSize\": 15,    \"Font\": \"Arial\",    \"ForegroundColor\": {      \"A\": 0,      \"R\": 66,      \"G\": 111,      \"B\": 245    },    \"BackgroundColor\": {      \"A\": 10,      \"R\": 179,      \"G\": 245,      \"B\": 66    },    \"FontStyle\": \"Regular\"  },  \"BottomMargin\": 3,  \"LeftMargin\": 3,  \"RightMargin\": 3}"
使用 cURL 指令將圖像頁尾新增至 PDF
請執行以下命令,使用 cURL 命令將圖像頭新增至 PDF 檔案。
curl -X POST "https://api.aspose.cloud/v3.0/pdf/marketing.pdf/footer/image?startPageNumber=1&endPageNumber=1" \
-H  "accept: application/json" \
-H  "authorization: Bearer <JWT Token>" \
-H  "Content-Type: application/json" \
-d "{  \"Background\": false,  \"HorizontalAlignment\": \"Left\",  \"Opacity\": 0.7,  \"Rotate\": \"None\",  \"RotateAngle\": 10,  \"XIndent\": 10,  \"YIndent\": 10,  \"Zoom\": 0.7,  \"FileName\": \"Koala.jpg\",  \"Width\": 100,  \"Height\": 100,  \"BottomMargin\": 2,  \"LeftMargin\": 1,  \"RightMargin\": 10}"
結論
總之,在 PDF 文件的頁腳部分添加圖像和文字可以成為各種用途的有用功能,包括品牌推廣、法律合規和文件組織。 Aspose.PDF Cloud SDK for Python 提供了一個方便且強大的方法來在您的 Python 應用程式中實現此功能。另一方面,使用具有 Aspose.PDF Cloud API 的 cURL 命令可以提供靈活性和簡單性,以將此功能整合到各種程式語言和環境中。無論您選擇哪種方法,Aspose.PDF Cloud 都提供強大且可靠的工具,可將圖像和文字新增至 PDF 文件的頁尾部分。
有用的連結
— 產品文件
相關文章
我們建議您閱讀以下文章來了解: